FIX: Windows Update Error 0x8024401c
Some of the following solutions need you to tinker with the system registry settings. So it’s a good idea to create a system restore point before starting the troubleshooting operation. In case you make any mistakes, you can roll back Windows 10 and begin again.
1. Use the Windows Update troubleshooter
The Windows Update troubleshooter runs a quick scan on your computer to identify and resolve common problems that prevent the system’s updating tool from working properly. Here’s how you can use it:
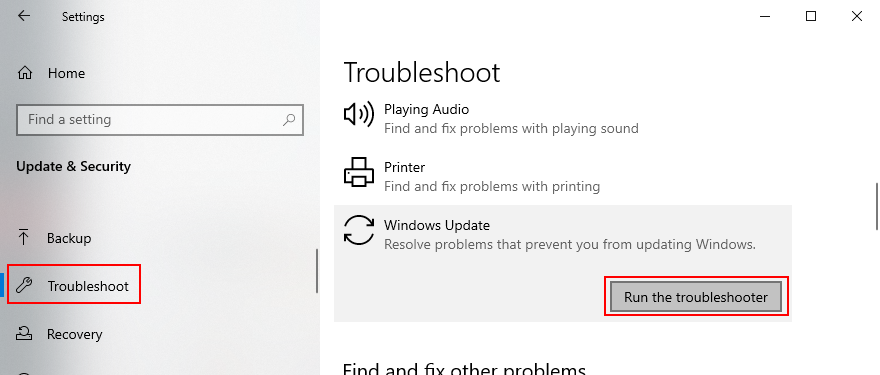
- Press the Win key, search for Troubleshoot settings, and press Enter
- Click Additional troubleshooters
- Find and select Windows Update
- Click the Run the troubleshooter button
- Follow the wizard steps and allow Windows to apply any fixes
2. Use Windows Update Diagnostic
More Windows Update issues can be resolved by Windows Update Diagnostic:
- Sign in to Windows 10 using an admin account
- Download Windows Update Diagnostic from the official website
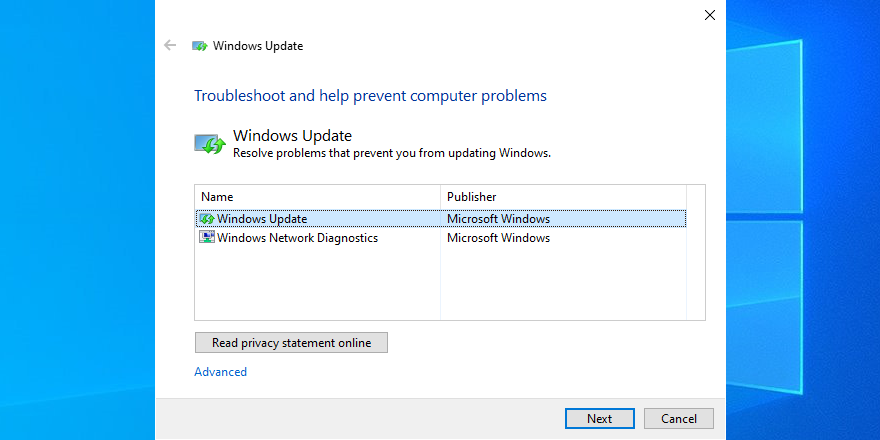
- Start the app and select Windows Update
- Click Next and follow the step-by-step instructions
- Launch the app again and choose Windows Network Diagnostics
- Click Next and follow the remaining steps
- Restart your computer
3. Check Services
Some system services are tied to Windows Update and must be allowed to run. Others might clash with the app and should be disabled to stay on the safe side. Here’s what you have to do:
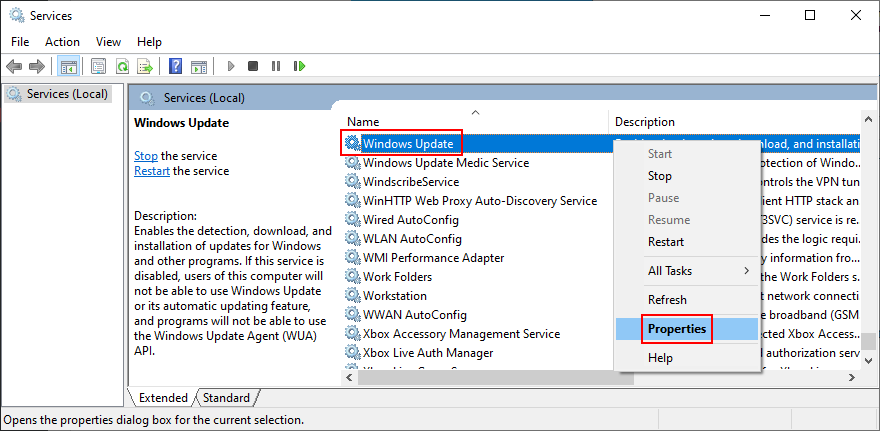
- Click the Start button, write Services, and open this app
- Right-click Windows Update and go to Properties
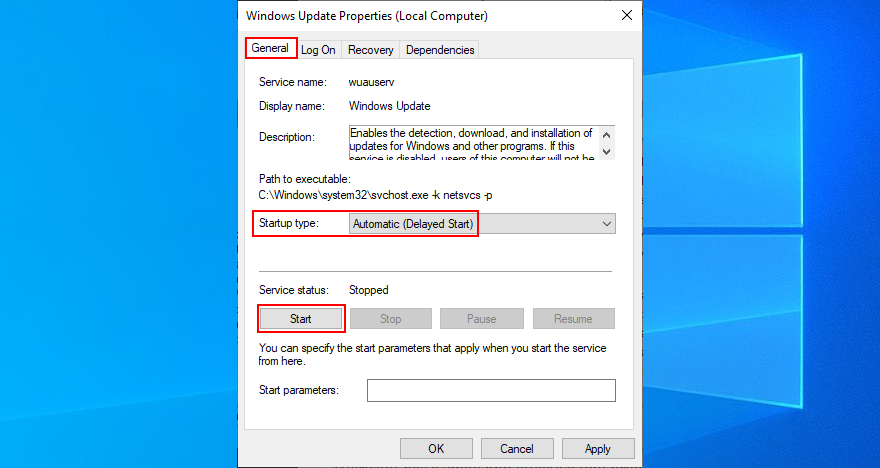
- Set Startup type to Automatic (Delayed Start) and click the Start button
- Click Apply
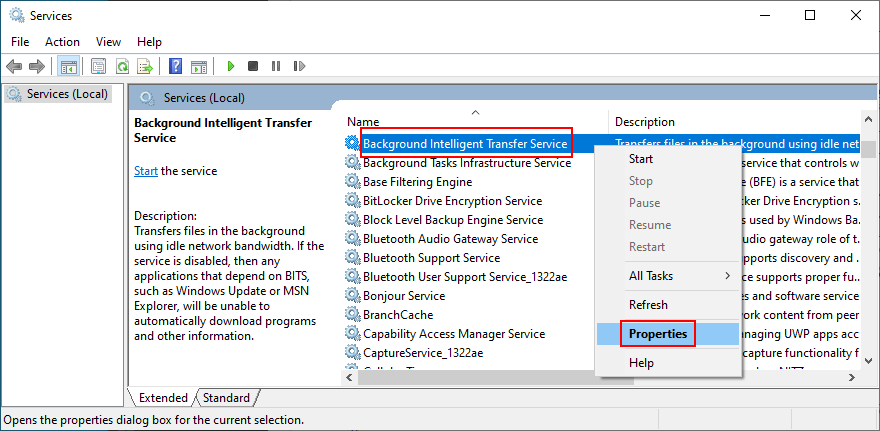
- Find the Background Intelligent Transfer Service and App Readiness entries and set the same options
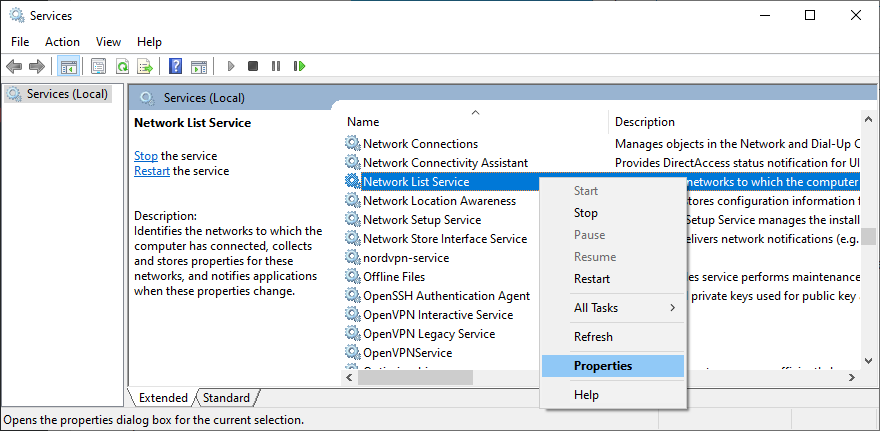
- Find Network List Service and access its properties
- Set Startup type to Disabled and click Stop
- Click Apply and quit to the desktop
4. Check Group Policy
You should head over to the Local Group Policy Editor to make sure that Windows Update is allowed to run on your computer. Otherwise, you could end up with error 0x8024401c.
- Click the Start button, search for edit group policy, and hit Enter
- Go to the following location: Computer Configuration > Administrative Templates > Windows Components > Windows Update
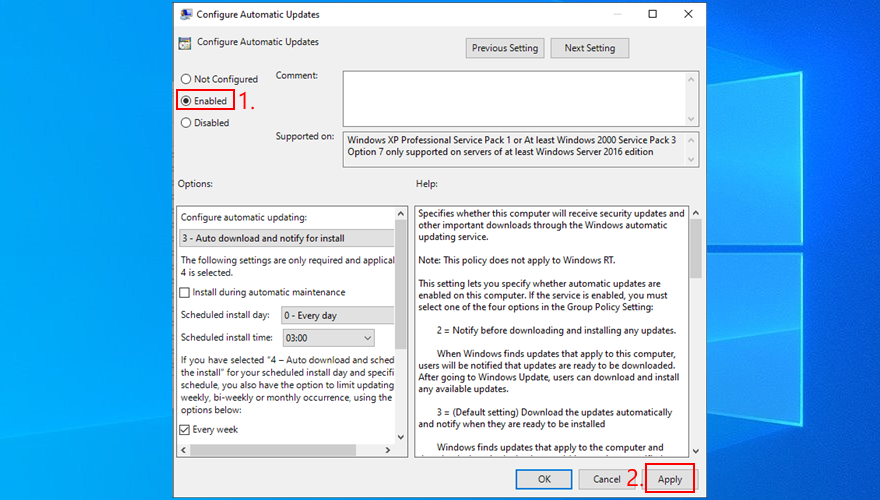
- Double-click Configure Automatic Updates to view its properties
- Select Enabled, click Apply, and exit to the desktop
5. Reset Windows Update from Command Prompt
You can clear the Windows Update cache by resetting all software components involved in its services, thanks to the command-line environment:
- Make sure to log in to Windows 10 using an admin account
- Press the Windows key, type cmd, and open the Command Prompt app
- Enter these commands and press Enter after each line:
- net stop wuauserv
- net stop cryptSvc
- net stop bits
- net stop msiserver
- ren C:\Windows\SoftwareDistribution SoftwareDistribution.old
- ren C:\Windows\System32\catroot2 Catroot2.old
- net start wuauserv
- net start cryptSvc
- net start bits
- net start msiserver
- Restart your PC
6. Check registry settings
Using Registry Editor, you should inspect some entries that affect Windows Update, in order to make sure that everything is in working order. Here’s what you need to do:
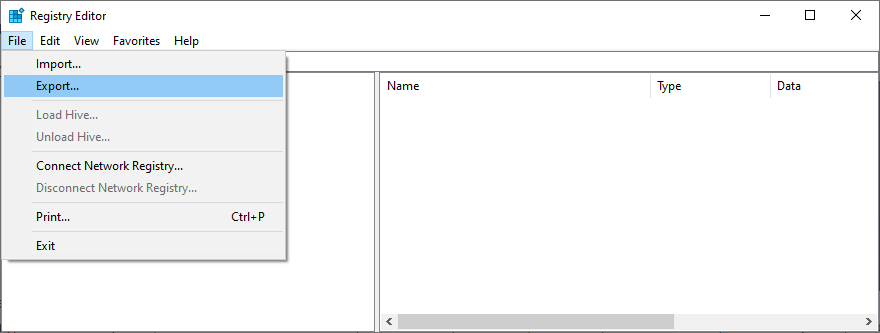
- Press Windows key + R, write regedit, and hit Enter to open Registry Editor. If prompted by UAC (User Account Control), click Yes
- Open the File menu and select Export
- Create a registry backup file by specifying the file name and saving directory
- Go to the following location: Computer\HKEY_LOCAL_MACHINE\SOFTWARE\Microsoft\Windows\CurrentVersion\WindowsUpdate\Auto Update

- Check whether or not EnableFeaturedSoftware exists. If so, ensure that Data is set to 0x00000001 (1). Otherwise, double-click its entry, set Value data to 1 and Base to Hexadecimal, then click OK
- However, if EnableFeaturedSoftware doesn’t exist, you must create it:
- Select Edit > New > DWORD (32-bit) Value
- Enter the EnableFeaturedSoftware entry and double-click it
- Set Value data to 1 and Base to Hexadecimal, then click OK
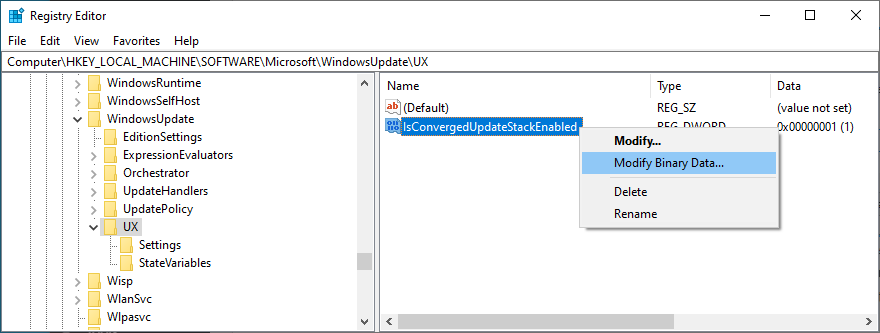
- Head over to this location: HKEY_LOCAL_MACHINE\SOFTWARE\Microsoft\WindowsUpdate\UX
- Double-click IsConvergedUpdateStackEnabled, set Value data to 0 and Base to Hexadecimal, then click OK https://1839e85db095cac4ecc29198fcd1e23f.safeframe.googlesyndication.com/safeframe/1-0-38/html/container.html
- Now, head over to this destination: HKEY_LOCAL_MACHINE\SOFTWARE\Microsoft\WindowsUpdate\UX\Settings
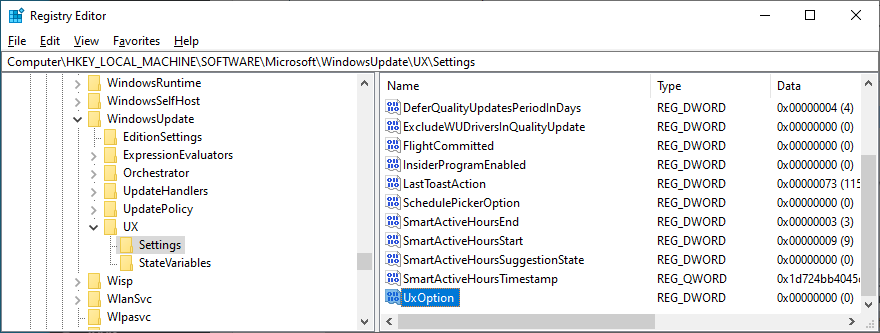
- Double-click UxOption, set Value data to 0 and Base to Hexadecimal, then click OK
- Next, visit: HKEY_LOCAL_MACHINE\SOFTWARE\Policies\Microsoft\SystemCertificates
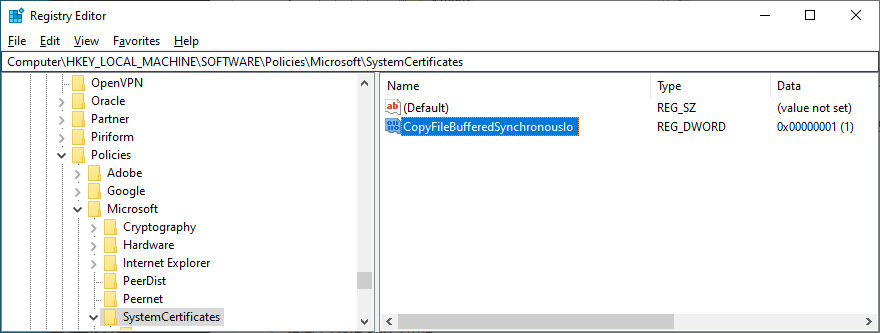
- Check whether or not CopyFileBufferedSynchronousIo exists. It so, make sure its Data is set to 0x00000001 (1). Else, double-click the entry, set Value data to 1 and Base to Hexadecimal, then click OK
- If CopyFileBufferedSynchronousIo doesn’t exist:
- Select Edit > New > DWORD (32-bit) Value
- Rename the entry to CopyFileBufferedSynchronousIo and double-click it
- Set Value data to 1 and Base to Hexadecimal, then click OK
- Quit to the desktop


7. Update your network drivers
If you’re experiencing network connectivity issues, you should check your network drivers since they might be outdated, especially if you still have the stock drivers because you never performed an update.
The quickest and safest way is to use a driver updating application for updating all obsolete drivers at the same time. However, if you don’t want to install any third-party programs, you can turn to Device Manager:
